Welcome to Art class at B. Bernice Young School!
Virtual Learning Week 3
Virtual Learning Week 3

Hi to all of my Young School artists creating artwork at home! I'm doing the same. I miss you and I love seeing photos of your artwork!
These online art lessons are provided to you electronically in order to continue art instruction at home while school is closed.
Please scroll down and find your grade level lesson. Be sure to also check out the optional art challenge of the week! It's a fun one!
Feel free to adapt each lesson with art materials that you have available at home.
Each lesson is open ended and promotes student choice. Try your best and have fun!
When your artwork is complete please email me a photo of your work and include your name and classroom teacher's name in the email.
I can't wait to see your beautiful artwork!
When your artwork is complete please email me a photo of your work and include your name and classroom teacher's name in the email.
I can't wait to see your beautiful artwork!
If you have any questions or concerns please email Mr. Giannetto.
Please also follow me on Facebook: Young School Art with Mr. Giannetto
and Instagram @youngschoolartwithmr.g for additional art activities.
I have created numerous art lessons on the educational website Fantastic Fun and Learning which can be an additional art resource for you. The art activities can be adapted and modified for your child's age and ability level. The newest lesson, Muffin Tin Maze, has children designing and creating a handheld game.
Mr. Giannetto for Fantastic Fun and Learning

Optional Art Challenge of the Week: Chalk the Walk
This is an optional art activity for all Young School students, families, and staff!
These Young School students and teachers already got in on the fun!

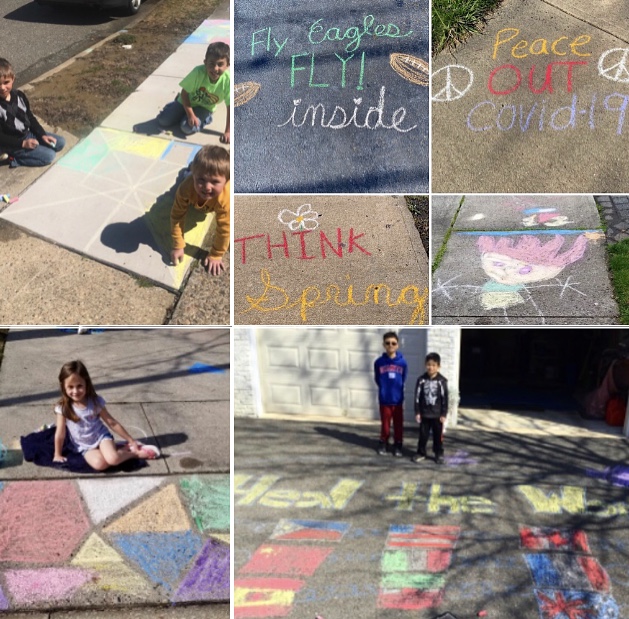


You may have seen this outdoor art activity spreading across the country and all over social media. Let’s bring some cheer and uplifting messages to Burlington Township! If you have sidewalk chalk, head outside and draw on your driveway or sidewalk. Rainbows, flowers, smiles and more are sure to brighten our spirits. Try using painter's tape to add a geometric color blocking design. Add messages of thanks and hope for our community!
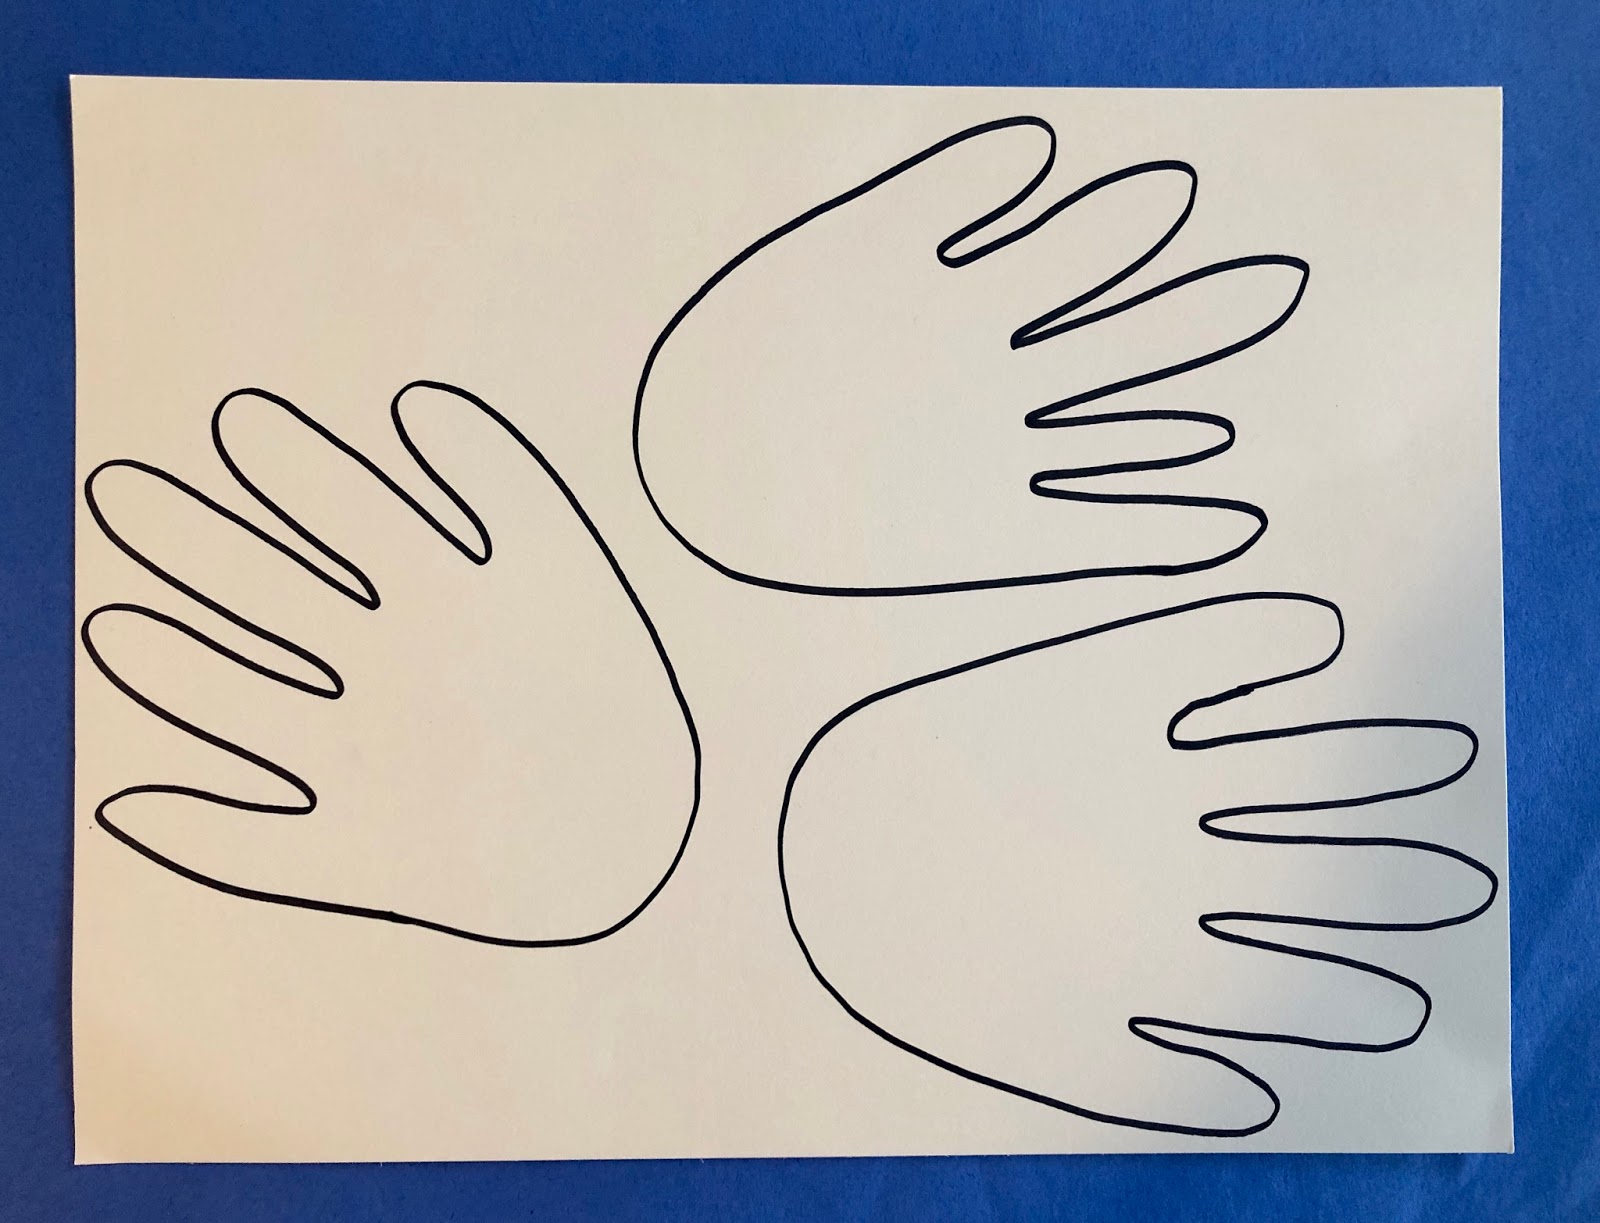
Kindergarten Hand Print Fish

Materials: paper, watercolor paint, brush, water, scissors, glue, construction paper
If paint is not available use crayons and/or markers.
Step 1: Trace your hands three times on a piece of paper. Spread out your fingers and trace carefully and slowly. Paint the hands with watercolor paint. To produce a bright color be sure to make circles or go "round and round" with your brush in the paint pan. Remember to hold your paintbrush like a pencil.


Step 2: As the paint is drying begin to create an underwater scene for the fish. Cut out waves, seaweed, and sand. What else could you add to the sand? Seashells? A starfish?

Step 2: As the paint is drying begin to create an underwater scene for the fish. Cut out waves, seaweed, and sand. What else could you add to the sand? Seashells? A starfish?
Glue down all of the pieces. Feel free to use markers to add the waves and seaweed if construction paper is not available.


Step 3: Cut out the painted hands. Remember the song that we sing in class..."Follow the line, every time, do your best, clean up your mess." Begin to glue the hands to the underwater scene. Glue the tail first and layer the other hands overlapping as you go.


Step 4: Add any other details including an eye and mouth. Optional: follow the step by step drawing directions to add seashells to your work.

Talk About Art
Recall the different art supplies you used to create this project.
What part of the project did you enjoy the most?
Which part was the most challenging?
1st Grade-STEAM Challenge: Build a Boat
Build a boat for a small toy figure. The goal is to keep the toy safe and dry! You also need to keep the boat afloat. Weight, balance, and the design/construction of your boat are all important factors to keep in mind.


STEAM (Science, Technology, Engineering, Art, and Math) exploration boosts the development of critical thinking skills, problem solving skills, hands-on learning, and creative thinking.
Materials: small toy figure, paper plate, tape, scissors, a large bowl, sink, or tub of water
Optional Building Materials: cereal box, paper tubes, tinfoil, paper cup, straws, bubble wrap, construction paper, water bottle, etc.
Optional Building Materials: cereal box, paper tubes, tinfoil, paper cup, straws, bubble wrap, construction paper, water bottle, etc.
Warm up: Pick a small toy figure from your collection and identify the type of boat that you would like to make. Recall different types of boats such as sailboat, cruise ship, rowboat, canoe, speed boat, etc.
Identify parts of the boat that you will need to make, including the sails of the boat, the bottom of the boat, and railings to keep your toy safe.
Step 1: Begin to build your boat. Make sure to create all the parts of the boat you named earlier. Each boat will be one of a kind! Have fun and try different ideas!
Step 2: Put your boat into the water and add the toy inside.
Oh no! My toy figure fell into the water! Yikes! My boat is sinking! That’s okay! We can learn from our mistakes and try again.
Talk About Art
What type of boat did you make?
What was the most challenging part of building the boat?
Did your toy figure stay dry?
2nd Grade Vincent van Gogh Sunflowers

Earlier in the school year we created our own Starry Night landscape based on the artist Vincent van Gogh's famous painting. We used black tempera paint and oil pastels. We tried to represent van Gogh's style of art by focusing on bright colors, movement, and layering dashes of color to mimic the thick paint on the canvas.

Warm up: Recall the trick that Mr. G taught you to remember the artist's name.
Point to Mr.G (my first name is also Vincent). Use your hands to pretend you are driving a van. Lastly, press your foot on the pedal to make the van Gogh!
Vincent van Gogh
Today we're going to look at Vincent van Gogh's series of Sunflower paintings.
What do you see when you look at the painting? What do you smell? Can you find flowers in all stages of life including flower buds, blooms, and wilting flowers? Why are some of the flowers drooping?


Materials: construction paper, scissors, glue stick, crayons
Step 1: Print out this vase pdf or draw one of your own.


Step 3: Cut stems, leaves, and triangles.

Step 4: Begin to glue the stems to each flower. It's a nice idea to sneak the end of the stem a bit under the brown circle. Next, glue a few leaves to each stem. Finally, glue the triangles around each brown circle to create petals. To create a pop up petal, glue the base of the triangle down and bend up the remaining portion. On the brown half circles add a few triangles to the flat side to create a bloom in profile.


Step 5: Color the vase and the background.

Talk About Art
What type of flowers did you create?
Name the artist that goes along with the lesson.
How many buds, blooms, and wilting flowers do you see in your work?
The Burlington Township School District is committed to making our website accessible for students, staff, and the community. You may request information in an alternate format. Please contact the community relations office to make requests.


